- What Ingredients Are Included in the Pineapple-Coconut Cake?
- How Many Slices Can I Get Out of the Cake, and What Are the Best Ways To Serve It?
- What Is the Best Way To Store This Pineapple-Coconut Cake?
- How To Make Pineapple With Coconut Cake
- Notes:
- FAQs:
- Pineapple Coconut Cake
- Nutritional Information (per serving):
When it comes to summer parties, few desserts evoke the essence of tropical bliss quite like a coconut pineapple cake. Just the mention of its name conjures images of sandy beaches and leisurely days under the sun!
pineapple Coconut Cake There are countless ways to create this delectable cake, but I’ve perfected a recipe that’s been a bakery favorite for years. It features a luscious homemade pineapple curd and a generous topping of shredded coconut, elevating it to irresistible heights.
Are you ready to embark on a culinary journey to the tropics? Look no further than our irresistible pineapple Coconut Cake recipe! This delightful dessert captures the essence of paradise with its luscious blend of pineapple and coconut flavors. Whether you’re craving a taste of summer or simply want to treat yourself to a slice of indulgence, this cake is sure to satisfy your sweet tooth.
At RecipeCookOnline.com, we’re passionate about sharing mouthwatering recipes that inspire culinary creativity. Our Pineapple Coconut Cake recipe is no exception. With easy-to-follow instructions and simple ingredients, you can whip up this tropical delight in no time.
What Ingredients Are Included in the Pineapple-Coconut Cake?
- You know what’s an unbeatable flavor duo straight from paradise? Pineapple and coconut, hands down! The sweet, tangy kick of pineapple perfectly complements the creamy, tropical nuttiness of coconut. Each bite feels like a mini getaway to the beach – no joke!
- Let’s talk about those cake layers. They’re seriously moist, thanks to the magical combo of coconut milk, pineapple juice, and sometimes a splash of buttermilk. These ingredients blend harmoniously, creating a texture that practically melts in your mouth. And those pineapple chunks? They’re like little bursts of juicy sweetness scattered throughout the cake, adding an extra layer of tropical bliss.
- But this cake isn’t just a one-trick pony. It’s a versatile superstar! It pairs effortlessly with grilled chicken, pork, or fish, adding a touch of tropical flair to savory dishes. And when it comes to frosting, it’s a match made in heaven with cream cheese or berry buttercream frostings like strawberry or raspberry. Talk about a flavor explosion! Yum!
How To Make Pineapple With Coconut Cake
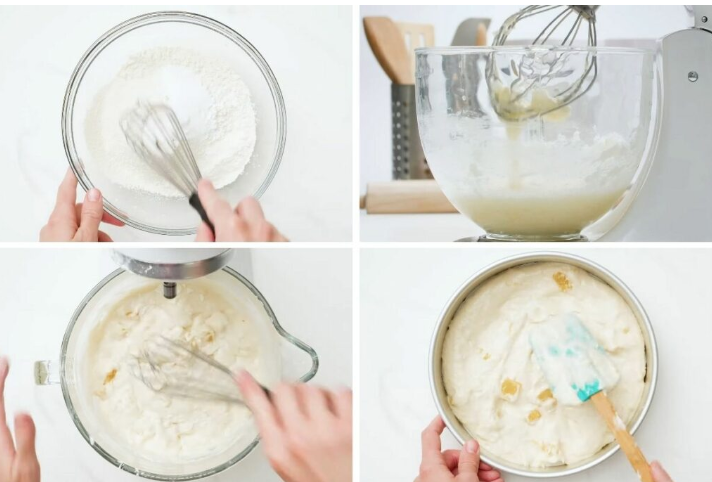
Step 3: Mixing the Wet Ingredients
Now, let’s get mixing! Bring out your trusty mixer, whether it’s a stand mixer or a handheld one. Here’s what you’ll need to do:
- Beat the unsalted butter with the sugar at a medium-high speed until the mixture becomes creamy and smooth. This should take around 2 minutes. Don’t forget to periodically scrape down the sides of the bowl with a rubber spatula to ensure everything gets incorporated evenly.
- Once the butter and sugar are nicely creamed together, it’s time to add the egg whites. Mix until they are fully incorporated and the mixture is smooth.
- Now, add the sour cream, coconut extract, and vanilla extract to the mixture. Turn up the speed and whisk everything together until well combined.
- At this stage, don’t be alarmed if the mixture looks a little funky or curdled. This can happen due to the differences in textures between the ingredients, but it’s perfectly normal. Just keep mixing, and everything will come together beautifully!
Step 4: Incorporating the Dry Ingredients and Pineapple Coconut Flavors
Now that our wet ingredients are well mixed, it’s time to bring everything together into a delicious batter. Here’s what to do:
- With your mixer set to low speed, gradually add the dry ingredients mixture into the wet ingredients. Along with the dry ingredients, pour in the pineapple juice and coconut milk. Mix at a lower speed until everything is just combined. Be careful not to overmix; we want to avoid developing too much gluten, which could result in a tough cake.
- Once the dry ingredients and liquids are incorporated, it’s time to add in the pineapple chunks and shredded coconut flakes. Gently fold them into the batter by hand using a spatula or wooden spoon. We want to ensure that these delicious additions are evenly distributed throughout the batter, without crushing the pineapple chunks.
- Take a moment to admire your cake batter—it may be a bit on the thicker side, but that’s perfectly normal for this recipe. The flavors of pineapple and coconut are beautifully infused, promising a delectable tropical treat with every bite.
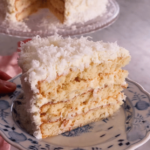
Pineapple Coconut Cake
Ingredients
- 2 cups all-purpose flour
- 1 cup granulated sugar
- 1 teaspoon baking powder
- 1/2 teaspoon baking soda
- 1/4 teaspoon salt
- 1 cup canned crushed pineapple drained
- 1 cup shredded coconut
- 1/2 cup unsalted butter melted
- 1/2 cup coconut milk
- 2 large eggs
- 1 teaspoon vanilla extract
- For the Frosting:
- 1/2 cup unsalted butter softened
- 8 ounces cream cheese softened
- 4 cups powdered sugar
- 1 teaspoon vanilla extract
- 1 cup shredded coconut toasted (for garnish)
Instructions
- Preheat your oven: Preheat the oven to 350°F (175°C). Grease and flour a 9x13-inch baking pan or two 9-inch round cake pans.
- Mix the dry ingredients: In a large mixing bowl, whisk together the flour, sugar, baking powder, baking soda, and salt until well combined.
- Prepare the wet ingredients: In another bowl, mix together the drained crushed pineapple, shredded coconut, melted butter, coconut milk, eggs, and vanilla extract until evenly combined.
- Combine wet and dry ingredients: Gradually add the wet ingredients to the dry ingredients, stirring until just combined. Be careful not to overmix.
- Bake the cake: Pour the batter into the prepared baking pan(s) and smooth the top with a spatula. Bake in the preheated oven for 25-30 minutes, or until a toothpick inserted into the center comes out clean. If using two round pans, reduce baking time to about 20-25 minutes.
- Cool the cake: Allow the cake to cool completely in the pan before frosting.
- Make the frosting: In a mixing bowl, beat together the softened butter and cream cheese until smooth and creamy. Gradually add the powdered sugar and vanilla extract, beating until the frosting is light and fluffy.
- Frost the cake: Once the cake has cooled, spread the frosting evenly over the top and sides of the cake.
- Toast the coconut: Spread the shredded coconut on a baking sheet and toast it in the oven at 350°F (175°C) for about 5-7 minutes, or until lightly golden brown. Keep an eye on it to prevent burning.
- Decorate: Sprinkle the toasted coconut over the frosted cake for a beautiful and delicious finishing touch.
- Serve and enjoy: Slice the cake and serve it to your guests, or simply indulge in a slice yourself! Enjoy the tropical flavors of pineapple and coconut in every bite.
Notes
Nutritional Information (per serving):
Providing precise nutritional information per serving would require specific ingredient measurements and portion sizes from the recipe. However, here’s a general estimate of the nutritional breakdown for Pineapple Coconut Cake based on common ingredients used in similar recipes:
- Calories: Approximately 300-400 calories per serving
- Total Fat: Approximately 15-25 grams
- Saturated Fat: Approximately 8-12 grams
- Cholesterol: Approximately 50-100 milligrams
- Sodium: Approximately 150-300 milligrams
- Total Carbohydrates: Approximately 35-50 grams
- Dietary Fiber: Approximately 1-3 grams
- Sugars: Approximately 20-30 grams
- Protein: Approximately 3-6 grams
Please note that these values are approximate and can vary depending on factors such as specific ingredient brands, variations in recipe preparation, and portion sizes. If you need more precise nutritional information, you can input the recipe ingredients and quantities into a nutrition calculator tool or consult a registered dietitian